Useful Applications
This section describes some additional software that you might find useful when creating web pages.
Working with Notepad++
Notepad++ is a text editor that is similar to Notepad, but includes some additional features that makes it helpful when working with web pages (and other programming languages).
- Download and install Notepad++ from http://notepad-plus-plus.org/download/.
- Open Notepad++.
- Select Language > H > HTML to indicate that you are creating an HTML file.
- Select File > Save As and save your file with an HTML extension.
- Create the content for your web page in the main editing window. Notice that Notepad++ tries to autocomplete words for you -- this is useful if you can't remember what the exact element is.
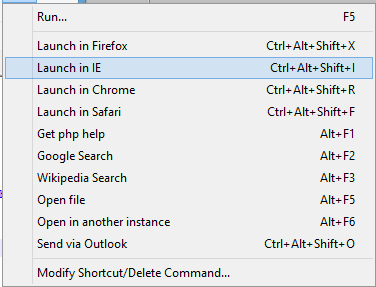
- To view your web page, select Run and one of the following options:
- Launch in Firefox
- Launch in Chrome
- Launch in IE
- Launch in Safari
Useful features for basic HTML editing
| Feature |
Example |
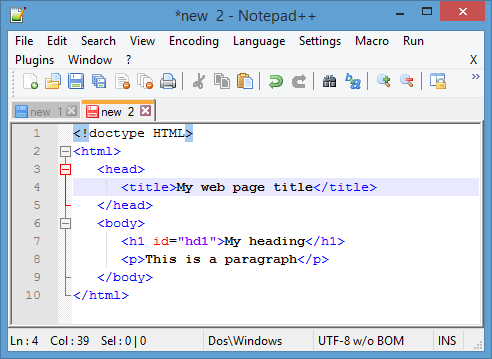
Color-coding
- HTML elements - blue
- Content - black
- Attributes - red
- Attribute values - purple
|
 |
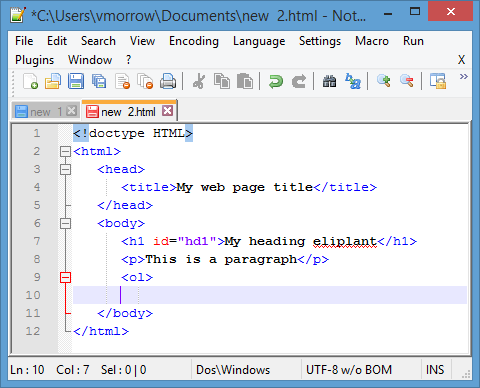
Spell check
You can spell-check documents in Notepad++ by selecting Plugins > DSpellCheck > Find Next Misspelling. Misspelled words are also underlined in red. |
 |
Browser support
Launch browsers from within the application
Under the Run menu, you can launch any of the most popular browsers. |
 |
Working with Firebug
Firebug is an extension for Firefox that allows you to view the underlying HTML and CSS for any web page that you view. You might find Firebug useful when you want to debug HTML and CSS interactions or if you are curious on how something is defined on a web page that you are visiting.
- Download and install Firebug from http://getfirebug.com/.
- Open a web page for which you want to look at the source code within Firefox.
- Position the cursor on the element on the web page for which you'd like to see the source HTML, right-click, and select Inspect Element with Firebug.
For example, if you were to right-click on Catalog in the menu in the upper right-corner, you would get the following result:
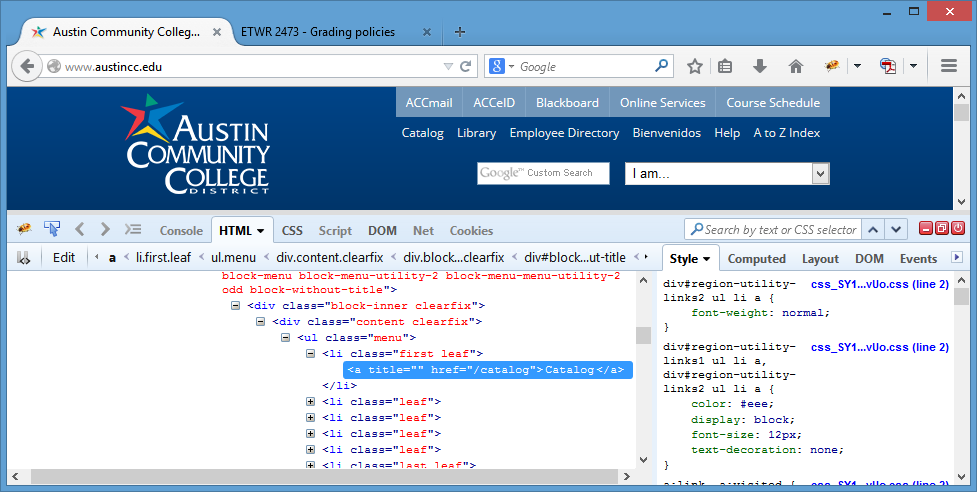
The left pane shows the HTML source for the element that you have selected. The right pane shows the style that is applied to that element.
Note: You can also start Firebug by clicking the Firebug icon on the toolbar: 
For more information about Firebug, refer to the following resources:
Working with the Snipping Tool
Windows provides a snipping tool that allows you to capture part of your screen (a free-form selection, a rectangular selection, or an entire window) or the full screen. You might find this tool useful if you are working on a software tutorial and want to include an image within your topic.
- In your Start menu, enter snipping in your search field.
- Double-click the Snipping Tool icon.
- When the Snipping Tool opens, click the drop-down arrow next to New to select the method that you want to use to get your screen capture.
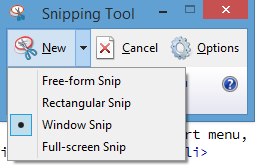
- Grab the section of the screen you want to capture:
- If you use Free-form Snip, hold and drag the mouse around the section of the screen you want to capture.
- If you use Regular Snip, draw a rectangle around the section of the screen you want to capture.
- If you use Window Snip, click on the title bar of the window that you want to capture.
- If you use Full-screen Snip, it will capture the screen automatically after you select the option.
- Select File > Save As to save the file.
- Enter a name in the File name field and click the drop-down arrow next to Save As type to indicate the type of file you would like to save the image as.
Resizing Images with Paint
Windows provides the Paint program to enable you to work with image files. This tutorial describes how to resize images. For a more complete description of Paint, see http://windows.microsoft.com/en-us/windows/using-paint#1TC=windows-7.
- In your Start menu, enter Paint in your search field.
- Double-click the Paint icon.
- In Paint, select File > Open and navigate to your image.
- Select the image and click Open.
- On the Home tab, click the Resize button in the toolbar.

- In the
Resize and Skew window, complete the following steps:
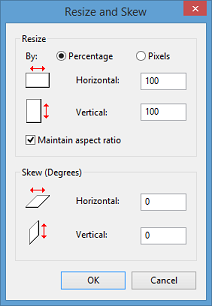
- Ensure that Maintain Aspect Ratio is checked.
- Select either Percentage or Pixels.
- If you selected Percentage, enter the percentage you want the image enlarged or reduced in the Horizontal field. If you selected Pixels, enter the new width (in pixels) for the image in the Horizontal field.
Note: The Vertical value will default based on what value you entered as the Horizontal width because you selected to maintain the aspect ratio.
- Click OK.
- Select File > Save to save the file.
Note:
If you want to save the image in a different format, select Save As and select the format from the Save as type drop-down field.


