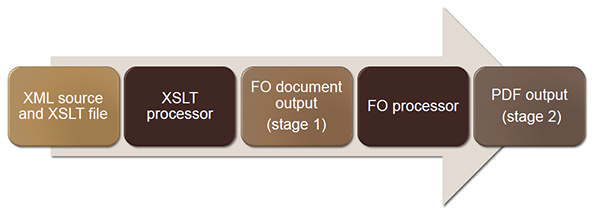
When defining transformation to turn XML source into PDF output, you use three different XML technologies:
Creating an XSL-FO document will use what you learned when developing XSLT for HTML output; the difference is that instead of using HTML tags to structure your content, you will use <xsl-fo> elements to format the text.
You will still use XPATH and XSLT elements to determine which elements you are formatting. You can reuse the rules that you specifies in your HTML transform, but your will replace your HTML elements with <xsl:fo> elements.
HTML vs. PDF transformations
The <xsl> tags that you will use are virtually identical whether you are creating a transformation for PDF output or HTML output. The difference lies in the building block elements that you use to define the contents of your output.
When you create an HTML document, you use HTML elements, such as <html>, <head>, <title>, <body>, and <p>, to define the structure of your HTML output file. When you create an FO document, you use <xsl:fo> elements to define the structure of the FO document that will be rendered into PDF output..
Consider the following example XSLT for an HTML transformation of the contact list that we used in previous lessons.
 <?xml    version="1.0" encoding="UTF-8"?>
 <xsl:stylesheet xmlns:xsl="http://www.w3.org/1999/XSL/Transform" version="1.0">
    <xsl:template match="/">
     <html>
       <head>
         <title> Contact List </title>
       </head>
       <body>
         <xsl:apply-templates/>
       </body>
     </html>
  </xsl:template>
  <xsl:template match="contact_list">
     <xsl:for-each select="contact">
       <xsl:sort select="name"/>
       <xsl:apply-templates/>
    </xsl:for-each>
  </xsl:template>
  <xsl:template match="name">
     <h1>
        <xsl:value-of select="lastname"/>, <xsl:value-of select="firstname"/>
     </h1>
  </xsl:template>
  <xsl:template match="phonenumber">
     <p>
        <b><xsl:value-of select="./@type"/>: </b>
        <xsl:value-of select="."/>
     </p>
  </xsl:template>
 <xsl:template match="note">
    <p><i><xsl:value-of select="."/></i></p>
 </xsl:template>
</xsl:stylesheet>
The file has the root-level element (<xsl:template match=”/”>) that indicates that you will match the entire document. It then constructs the HTML structure with the <xsl:apply-templates> element within the <body>. It also contains a series of templates for the <contact_list>, <name>, <phonenumber>, and <note> elements.
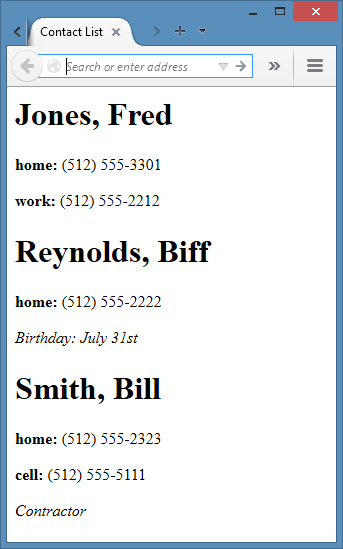
Running this transformation provides the following output:
Consider then the transformation for the same source for a FO output document. Note that the <xsl:stylesheet> declaration includes an additional namespace (xmlns:fo=”http://www.w3.org/1999/XSL/Format”). This namespace points to the XSL FO elements that you will use to define PDF output.
<xsl:stylesheet xmlns:xsl="http://www.w3.org/1999/XSL/Transform" version="1.0"
             xmlns:fo="http://www.w3.org/1999/XSL/Format">
   <xsl:template match="/">
   <fo:root xmlns:fo="http://www.w3.org/1999/XSL/Format">
      <fo:layout-master-set>
         <fo:simple-page-master master-name="main" page-height="11in" page-width="8.5in"
             margin-top="2.5in" margin-left="2in" margin-right="2in">
            <fo:region-body region-name="body"/>
         </fo:simple-page-master>
              </fo:layout-master-set>
              <fo:page-sequence master-reference="main">
                  <fo:flow flow-name="body">
                      <fo:block font-family="arial" font-size="20pt"> Contact List</fo:block>
                      <xsl:apply-templates select="contact_list"/>
                  </fo:flow>
              </fo:page-sequence>
          </fo:root>
      </xsl:template>
      <xsl:template match="contact_list">
         <xsl:for-each select="contact">
             <xsl:sort select="name"/>
             <xsl:apply-templates/>
         </xsl:for-each>
      </xsl:template>
      <xsl:template match="name">
              <fo:block font-family="sans-serif" font-size="18pt" padding-before="20pt">
                  <xsl:value-of select="lastname"/>, <xsl:value-of select="firstname"/>
              </fo:block>
      </xsl:template>
      <xsl:template match="phonenumber">
                  <fo:block font-family="sans-serif" font-size="12pt">
                      <fo:inline font-weight="bold">
                          <xsl:value-of select="./@type"/>:
                      </fo:inline>
                      <xsl:value-of select="."/>
                  </fo:block>
      </xsl:template>
     <xsl:template match="note">
              <fo:block font-family="sans-serif" font-size="10pt" font-style="italic">
                  <xsl:value-of select="."/>
              </fo:block>
      </xsl:template>
    </xsl:stylesheet>
This XSLT file uses all of the same <xsl:template>, <xsl:for-each>, <xsl:value-of>, and <xsl:applytemplates> statements as the HTML example to pull the content from the XML source file. What is different is the HTML element tags you saw previously have been replaced with different <fo> elements.
The following table describes the basic <fo> elements used in this example:
|
Element |
Descripton |
<fo:root> |
The root-level element for the FO document. |
<fo:layout-master-set> |
Includes the set of master pages to include for this file.
Master pages define the layout for the pages within the document. This example has a single master page. You might want to have more than one master page if you wanted to use a different page layout for the cover vs. the pages that include content. |
<fo:simple-page-master> |
Defines the layout of a single master page.
This element will include attributes for the page name, as well as the page height, width, and margins. |
<fo:region-body> |
Defines the region on the page in which the body of the content will be located.
This element will include an attribute for the region name. Other possible regions include region-start (a left side bar), region-end (a right side bar), region-before (header), and region-after (footer). |
<fo:page-sequence> |
Includes the content and formatting of text on the page.
Note that the page-sequence identifies the master page to use. |
<fo:flow> |
Defines where to place the flow of text for that page.
Note that the flow identifies the region name in which to place the text. |
<fo:block> |
Defines the structure for something that appears on its own line of text (like a paragraph). |
<fo:inline> |
Defines the structure for an inline element (such as bold). |
The rest of this lesson will describe the <fo> elements in more detail.
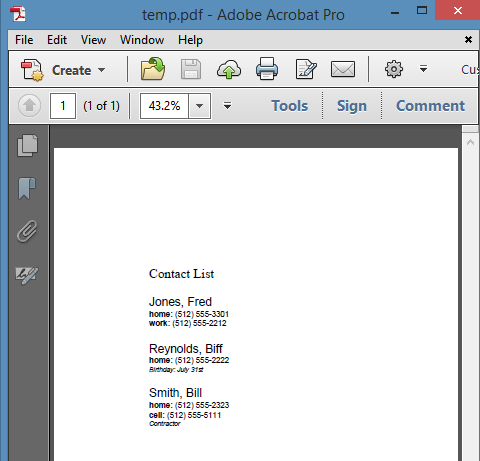
The results of this transformation would be similar to that of the HTML transformation:
Sections of the FO document
An FO document has two major sections:
- The <fo:layout-master-set> element that defines the physical layout of the page.
- The <fo:page-sequence> element that defines the content of the page itself.
Both are contained in the <fo:root> element.
The following example shows a very basic XSLT file that out output the contents of any XML source file into an FO format that can be rendered into a PDF file.
 <?xml    version="1.0" encoding="UTF-8"?>
 <xsl:stylesheet xmlns:xsl="http://www.w3.org/1999/XSL/Transform" version="1.0"
       xmlns:fo="http://www.w3.org/1999/XSL/Format">
       <xsl:template match="/">
          <fo:root xmlns:fo="http://www.w3.org/1999/XSL/Format">

              <!--    overall structure of the document -->
              <fo:layout-master-set>
                 <fo:simple-page-master master-name="sample">
                    <fo:region-body region-name="body"/>
                 </fo:simple-page-master>
              </fo:layout-master-set>

              <!--    content of the page itself -->
              <fo:page-sequence master-reference="sample">
                 <fo:flow flow-name="body">
                   <fo:block>
                     <xsl:apply-templates/>
                  </fo:block>
               </fo:flow>
            </fo:page-sequence>

        </fo:root>
   </xsl:template>
 </xsl:stylesheet>
Note the following:
- The <xsl:apply-templates/> element is within the <fo:page-sequence> section of the FO document. Content goes within this section of the document.
- The master-name attribute of the <fo:simple-page-master> element matches the master-reference attribute in the <fo:page-sequence> element. The master-reference attribute indicates with master page to use.
- The region-name attribute on the <fo:region-body> element matches the flow-name attribute on the <fo:flow> element. The flow-name attribute indicates which flow in which to place the content.
Specifying an <fo:root> element
The <fo:root> element contains the contents of the entire FO document. In your transformation, you define the <xsl:root> element directly inside your <xsl:template match=”/”> statement.
 <xsl:template match="/">
       <fo:root xmlns:fo="http://www.w3.org/1999/XSL/Format">
              …
       </fo:root>
 </xsl:template>
Specifying an <fo:layout-master-set> element
Within your root element, insert <fo:layout-master-set> element. This element contains any master pages that you define for your FO document.
<fo:layout-master-set>
   <fo:simple-page-master master-name="main"
                          page-height="11in"
                          page-width="8.5in"
                          margin-top="2.5in"
                          margin-left="2in"
                          margin-right="2in">
       <fo:region-body region-name="body"/>
    </fo:simple-page-master>
</fo:layout-master-set>
Within the <fo:layout-master-set> element, include the <fo:simple-page-master> element.
For the <fo-simple-page-master> element, specify the master-name attribute and set the page margins and sizes. The master-name attribute can be whatever you would like. You could have multiple master pages if you wanted to wanted to design more than one master page (for example, a cover page). However, each master page would need to have a unique name.
Include an <fo:region-body> element that names the region-name where content will be placed.
Specifying the <fo:page-sequence> element
The <fo:page-sequence> element provides a container for elements that will contain the content of your page. While the <fo:master-layout-set> defines the overall layout of the page, the <fo:page-sequence> page defines what content and formatting of the content on the page.
<fo:page-sequence    master-reference="main">
    <fo:flow flow-name="body">
         <xsl:apply-templates select="contact_list"/>
     </fo:flow>
</fo:page-sequence>
Note: If you have more than one master page, you should include an <fo:page-sequence> object for each page layout.
The <fo:page-sequence> element refers to the name of your <fo:simple-page-master> element via the master-reference attribute.
The <fo:flow> element refers to the name of your <fo:region-body> element via the flow-name attribute.
Within the <fo:flow> element, include an <xsl:apply-templates/> rule to apply the template for the root element of your XML source document. This example outputs the contents of the contact_list element.
Specifying an <fo:block> element
Within your <xsl:template> elements that you defined for your transformation, ensure that you use the <fo:block> element for each block of text that you want to appear on a single line. You will not only use it for where you might formerly had <p> elements, but wherever you want to insert headings (<h1>, <h2>, and so on).
The following example shows the templates for the <name>, <phonenumber>, and <note> elements.
<xsl:template match="name">
    <fo:block font-family="sans-serif" font-size="18pt"    padding-before="20pt">
         <xsl:value-of select="lastname"/>, <xsl:value-of select="firstname"/>    </fo:block>
</xsl:template>
<xsl:template match="phonenumber">
     <fo:block font-family="sans-serif" font-size="12pt">
         <fo:inline font-weight="bold">
            <xsl:value-of select="./@type"/>:
        </fo:inline>
        <xsl:value-of select="."/>
    </fo:block>
</xsl:template>
<xsl:template match="note">
   <fo:block font-family="sans-serif" font-size="10pt" font-style="italic">
       <xsl:value-of select="."/>
   </fo:block>
</xsl:template>
- In the template for name, you create a single <fo:block> element that will hold the contents of both the <lastname> and <firstname> elements. You define it has a sans-serif font (like Arial). You set the font-size larger than average at 18pt and add some padding before the block so that each contact has some space between them.
- In the template for phonenumber, you create a single <fo:block> to hold both the attribute that indicates the type of phone number and the phone number itself. You define it as a sans-serif font and set a smaller font size. (The next section will discuss that <fo:inline> element.
- In the template for note, you put the contents of the note in a <fo:block>. You specify that it will use a sans-serif font, set the size of the font down to 10 points, and decide to make the note italics.
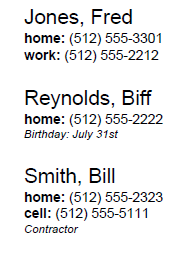
This results in the following output:
The following table describes some of the attributes that you can use to define attributes on the <fo:block> elements.
|
Attribute |
Description |
font-family |
The font family you would like to use (for example, sans-serif or serif) |
font-size |
The size of the font in pixels (for example, 12pt or 18pt) |
font-weight |
The weight of the font (for example, bold) |
font-style |
The style of the font (for example, italic or oblique) |
color |
The color of the text (for example, red) |
padding-right
padding-left
padding-before
padding-after |
The amount of padding (for example, 2pt or .24in) |
margin-right
margin-left
margin-top
margin-bottom |
The margin for the element (for example, .25in or 6pt) |
You can view the entire list of attributes within oXygen. Position your cursor within the <fo:block> element and the Attribute pane will display the list of available attributes.
Specifying an <fo:inline> element
Use an <fo:inline> element when you want to output an element that is not on its own line (for example, if you want to format a word in bold or italics).
The following example shows how to pull the value of the type attribute of a contact phone number, bold the text for that type, and include the content of the phone number on the same line.
<xsl:template match="phonenumber">
    <fo:block font-family="sans-serif" font-size="12pt">
       <fo:inline font-weight="bold">
          <xsl:value-of select="./@type"/>:
       </fo:inline>
       <xsl:value-of select="."/>
    </fo:block>
 </xsl:template>
The <fo:inline> element supports the font, color, and padding attributes described earlier in the table. For a complete list of attributes, position your cursor within an <fo:inline> element in oXygen and the attributes will be displayed within the Attribute pane.
Creating a list
If you want to create a bulleted or numbered list, you use the <fo:list> elements.
|
Element |
Description |
<fo:list-block> |
The container for the entire list of items.
It is similar to the <ol> or <ul> element in HTML. |
<fo:list-item> |
The container for the label and the content of an individual list item.
It is similar to the <li> element in HTML. |
<fo:list-item-label> |
The container for the label (bullet or number) for an individual list item.
Insert the entity • for a bullet or <number/> for a numbered list. |
<fo:list-item-body> |
The container for the actual content of the list item. |
The following example shows how to use these elements to create a bullet list for the phone numbers.
<xsl:template match="contact_list">
<xsl:for-each select="contact">
<xsl:sort select="name"/>
<fo:block font-family="sans-serif" font-size="18pt" color="red" space-before="2pt">
<xsl:value-of select="name/lastname"/>, <xsl:value-of select="name/firstname"/>
</fo:block>
<fo:list-block>
<xsl:for-each select="phonenumber">
<fo:list-item>
<fo:list-item-label>
<fo:block>•</fo:block>
</fo:list-item-label>
<fo:list-item-body start-indent="12pt">
<fo:block font-family="sans-serif" font-size="12pt">
<fo:inline font-weight="bold">
<xsl:value-of select="./@type"/>:
</fo:inline>
<xsl:value-of select="."/>
</fo:block>
</fo:list-item-body>
</fo:list-item>
</xsl:for-each>
</fo:list-block>
<fo:block font-family="sans-serif" font-size="10pt" font-style="italic">
<xsl:value-of select="note"/>
</fo:block>
</xsl:for-each>
</xsl:template>
In this example, you place the <fo:list-block> element outside the <xsl:for-each> element that lists each phone number.
Within the <xsl:for-each> statement, you create an <fo:list-item> element to contain the contents of each phone number.
Within that element, insert the <fo:list-item-label> element to identify the symbol that you want to use in front of the list. You include the actual symbol or number within an <fo:block> element. This example is using the entity for bullet (•). You could alternative use a hyphen or dash. If you wanted a numbered list, you would include <xsl:number/>.
After the <fo:list-item-label> element (but still within the <fo:list-item> element), create a <fo:list-item-body> element to hold the actual contents of the <phonenumber> type attribute and phone number. Note that the <fo:list-item-body> element includes a start-indent attribute so that the text is aligned and separated from the bullet. The <xsl:value-of> statements are within an <fo-block>.